When the VMware Cloud Director Availability (VCDA) architecture changed from Independent Disks to Replication Tracking (RT) VMs a lot of other things also changed in VMware Broadcom that left the RT VM as a bit of a dark art. Bryan van Eden did a nice blog post How to delete invisible RT based VM’s in VMware Cloud Director that shares good insights on what a RT VM is and how to delete it. I wanted to share from my experience some other useful information and tasks.
What is a RT VM?
A replication tracking virtual machine (RT VM) represents a shadow VM for replication placement that allows per-disk placement. An RT vApp is a vApp that consists of RT VMs. The VM is invisible from the VCD UI but the details can be retried from the VCD API.
How to view the details of a RT VM
The VCD API can be used to view the RT VM as demonstrated by Bryan van Eden, I personally like to use the VCDA Manager to connect to VCD and view the VM details.
Step 1 – SSH to the VCDA Manager
Step 2 – CLI to login to VCD
vcd -k l cloud_director_fqdn 'administrator@System' 'Password'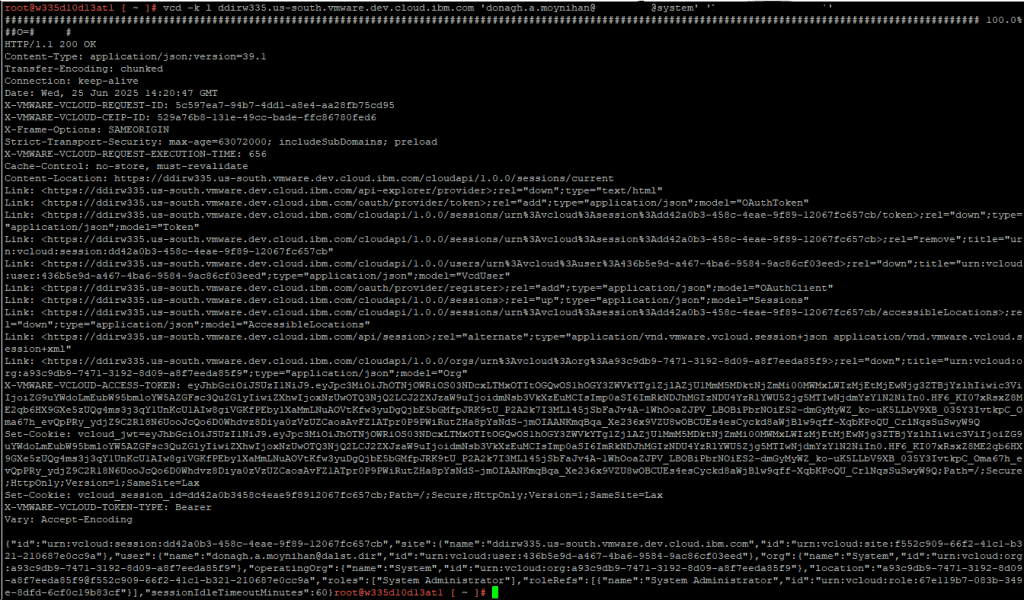
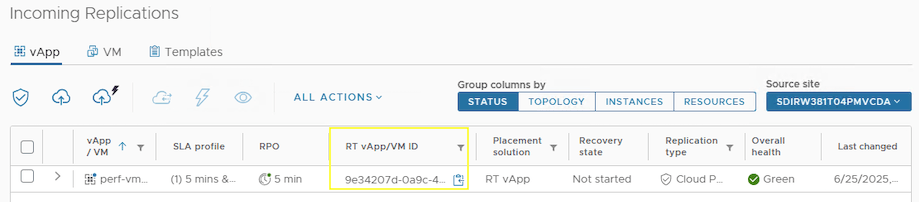
Step 3 – Get the RT vApp/VM ID
Step 4 – CLI to view RT VM
vcd -k g vApp/vapp-id
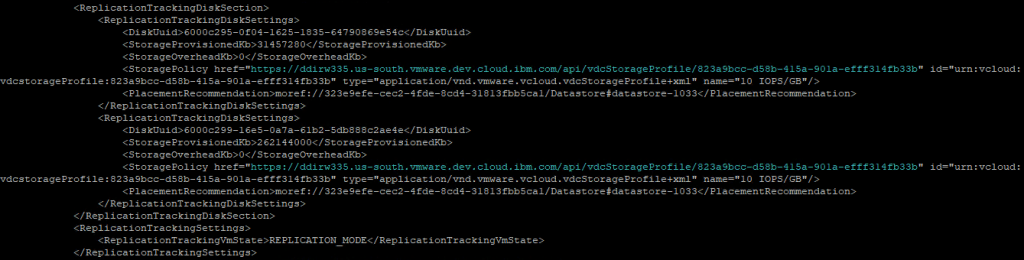
The most interesting part from a VCDA perspective is the ReplicationTrackingDiskSettings section as it tells you what datastore(s) are being used for disk placement.
How to detect a stale RT VM
For whatever reason if VCDA failed to delete the RT VM in VCD, a stale RT VM is left behind. As the VM is invisible it is not very obvious within VCD but the total number of VMs in a VDC does include RT VMs.
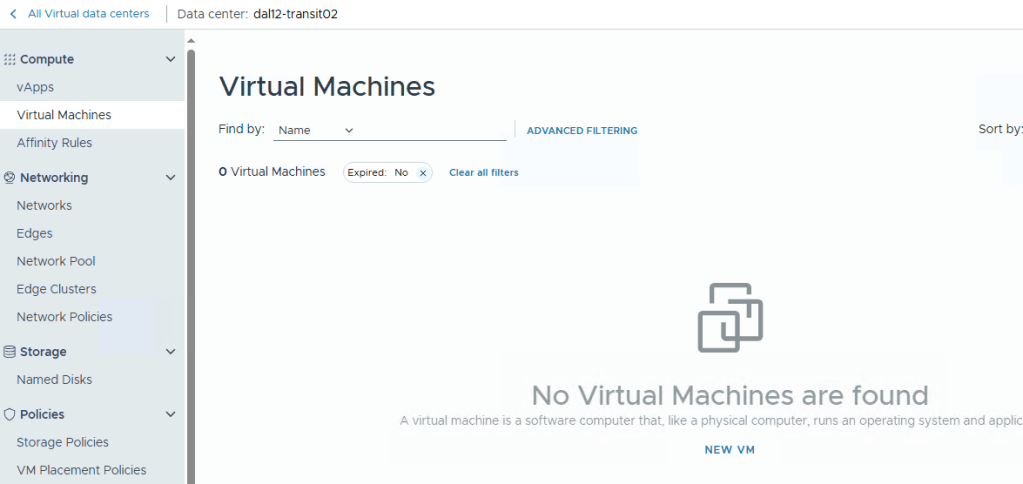
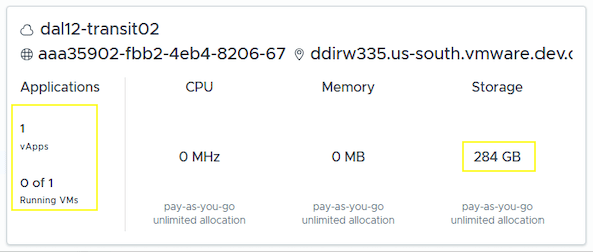
For example this VDC has no VMs.
However the VDC summary below includes the stale RT VM along with the storage it is using.
The following CLI call is useful to search VCD for VMs that are marked as hasOnlyReplicationModeVms.
vcd -k g 'query?type=adminVApp&fields=name&filter=(hasOnlyReplicationModeVms==true)&page=1&pageSize=128'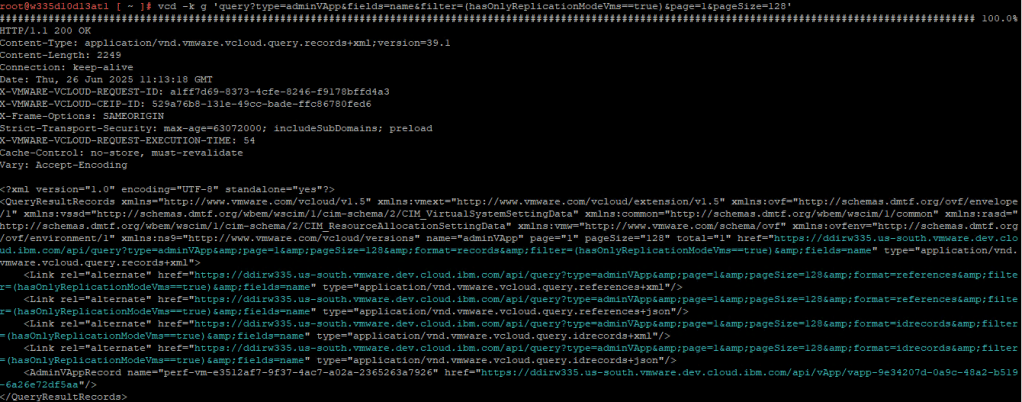
From the screenshot we have the following record for a RT VM which includes the vapp-id that we can use to delete the vApp/VM.
"<AdminVAppRecord name="perf-vm-e3512af7-9f37-4ac7-a02a-2365263a7926" href="https://ddirw335.us-south.vmware.dev.cloud.ibm.com/api/vApp/vapp-9e34207d-0a9c-48a2-b519-6a26e72df5aa"/"
You can also use grep if you know the name of the VM but take note of the initial page number as you might need to increase the pageSize or select a different page depending on the number of VMs retrieved.
vcd -k g 'query?type=adminVApp&fields=name&filter=(hasOnlyReplicationModeVms==true)&page=1&pageSize=128' | grep perf
How to delete a stale RT VM
After discovering the vapp-id of the stale RT VM we can use the following CLI to delete the RT VM.
vcd -k d vApp/vapp-id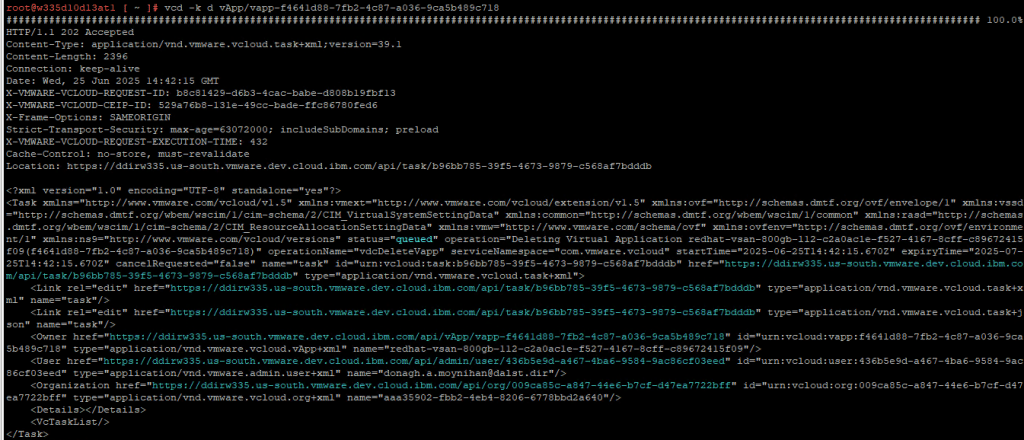
Broadcom related KB 369638
How to delete a stale Test Failover VM
A test Failover VM will be visible in VCD but cannot be deleted. The API call to delete a RT VM outlined above will fail with the error such as:
"Cannot delete VM donagh-vm2. A Replication Tracking VM in TEST_FAILOVER_MODE cannot be deleted." majorErrorCode="400" minorErrorCode="BAD_REQUEST"/>"
Broadcom KB 315145 gives more detail on to what tasks are disabled for RT VMs in Test Failover mode. The following steps outline to best approach to clean up a stale Test Failover VM.
Step 1 – Locate the vApp UUID
From the VCD GUI you can get the vApp UUID from the URL when you navigate to the vApp.
Step 2 – Query the vApp via the VCDA VCD API
vcd -k g vApp/vapp-idStep 4 – Get the vm-uuid to check the vApp replication tracking settings
From the VCD GUI you can get the VM UUID from the URL when you navigate to the VM. Once retrieved login to the VCD DB and check the vApp replication tracking settings.
SELECT * FROM replication_tracking_settings WHERE vapp_vm_id = 'vm-uuid';
Step 5 – Update the replication state in the VCD Database
To allow us to delete the VM using the vApp via the API we need to update the replication state in the database from TEST_FAILOVER_MODE to REPLICATION_MODE:
UPDATE replication_tracking_settings set replication_state='REPLICATION_MODE' where vapp_vm_id = 'vm-uuid';
Note: The vApp and VM will no longer be seen from the UI but we can be accessed via the API.
Step 6 – Delete the RT VM
vcd -k d vApp/vapp-id


Leave a comment